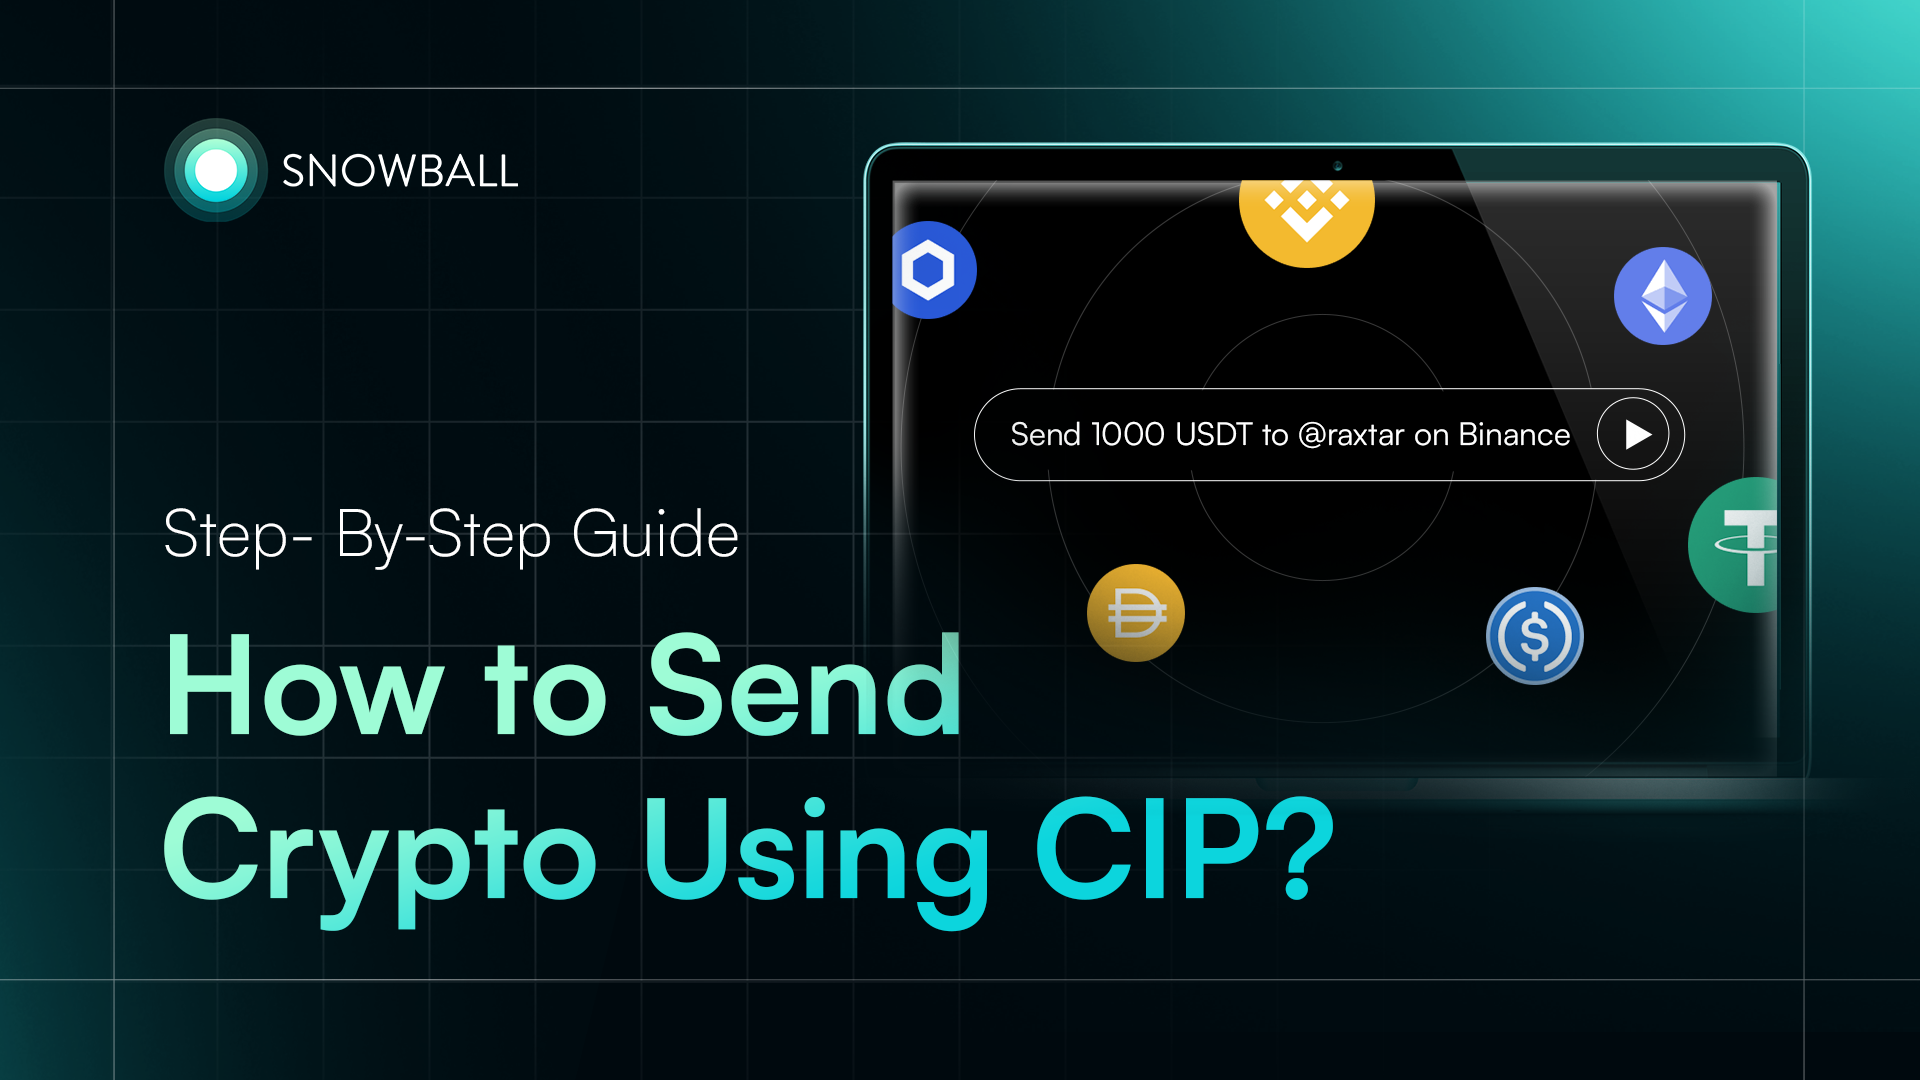
In this walkthrough, we’ll guide you through sending crypto using your identity via CIP, a protocol that connects wallets, names, and chains into one interoperable system.
Step 1: Access the CIP Platform
Head over to cip.snowball.money, your gateway to the Identity Transfer Layer.
Here, you’ll see the home interface, which has intuitive navigation for sending and requesting assets via your Snowball MNS identity or other supported naming systems.
If you are part of the MNS community or hold a Snowball MNS identity, you will be automatically redirected to the CIP DApp. Use the code “CIP40” to receive a 40% discount on your first MNS identity if you are new to the Snowball Ecosystem.
If you already have access, click on “Already have access” and enter your unique access password, which is “SnowballLabs.” Please note that the password is case-sensitive.

Step 2: Connect Your Wallet
Click “Connect Wallet” on the homepage.
CIP currently supports major EVM-compatible chains, with cross-chain support for non-EVM networks like Aptos, Solana, and Movement coming soon.
Once connected, you’ll see your account dashboard with your assets, transactions, and linked identity.
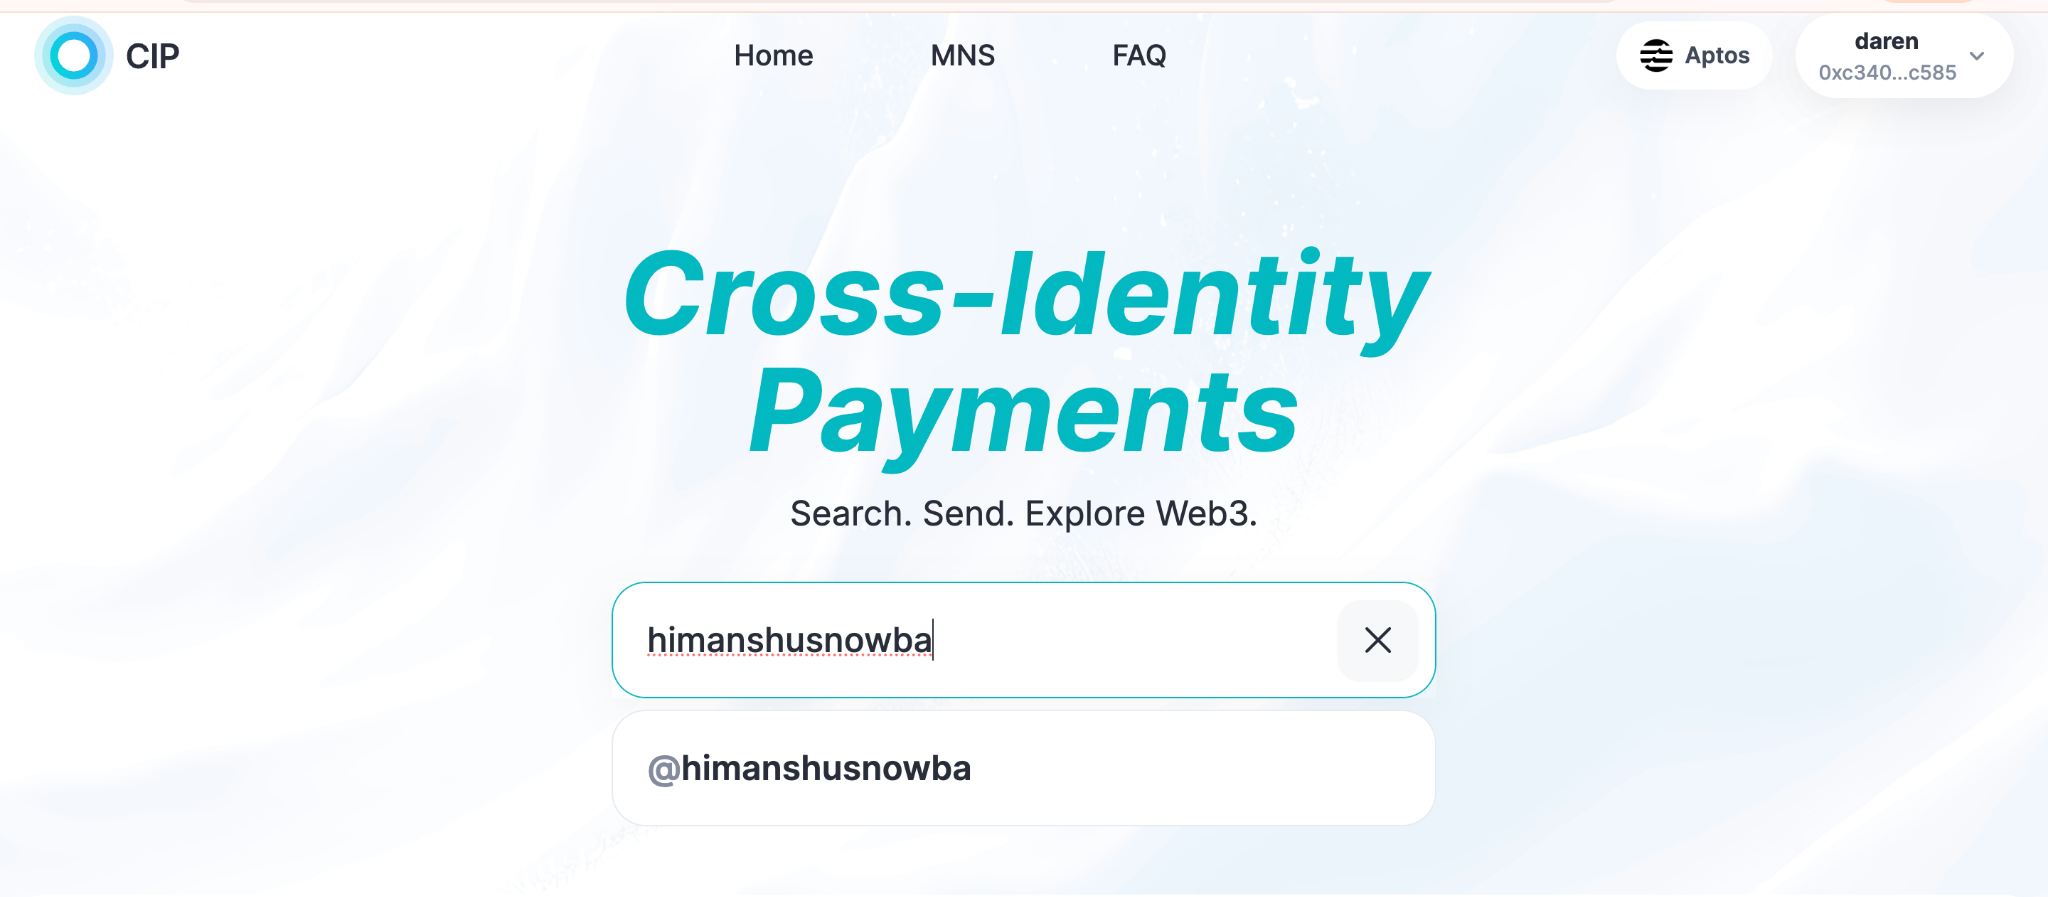
Search for your identity, you wanna send or receive funds from
Tip: For the best experience, make sure you’re using a wallet linked to your Snowball MNS identity.
Step 3: Choose “Send Assets”
Click " Send " from your dashboard to open the transaction interface. Once you have opened your identity, you can send funds.
Here’s where CIP’s magic begins. Instead of entering a wallet address, you can simply type in an identity like:
@alex.sns, @vitalik.eth, or @lisa.bnb,. Currently, CIP only supports Snobwall MNS Identities as of now.
CIP automatically detects the network, resolves the identity to the correct wallet, and ensures your transfer lands safely.

Step 4: Select Network and Token
Choose the network you want to send from: Ethereum, BNB Chain, or Polygon.
Next, select the token you want to send, such as ETH, BNB, or USDT.
CIP automatically checks compatibility and routing between sender and receiver chains, minimizing bridge friction and ensuring optimal cost and speed.

Step 5: Enter Amount & Review Details
Enter the amount of crypto you want to send or tap “Max” to send your entire available balance.
Before confirming, CIP will show:
- The resolved wallet address behind the name
- The selected route (bridge/swap if needed)
- Estimated gas and network fees
Pro Tip: CIP optimizes routes to find the most cost-efficient path automatically.

Step 6: Confirm & Send
Click “Send Transaction.”
Your wallet will prompt you to confirm the transfer. Once you approve it, CIP will take care of the rest.
The system securely routes your transaction to the correct network and verifies completion through on-chain validation.
You’ll see a “Transaction Successful” message; the recipient will instantly receive the funds.

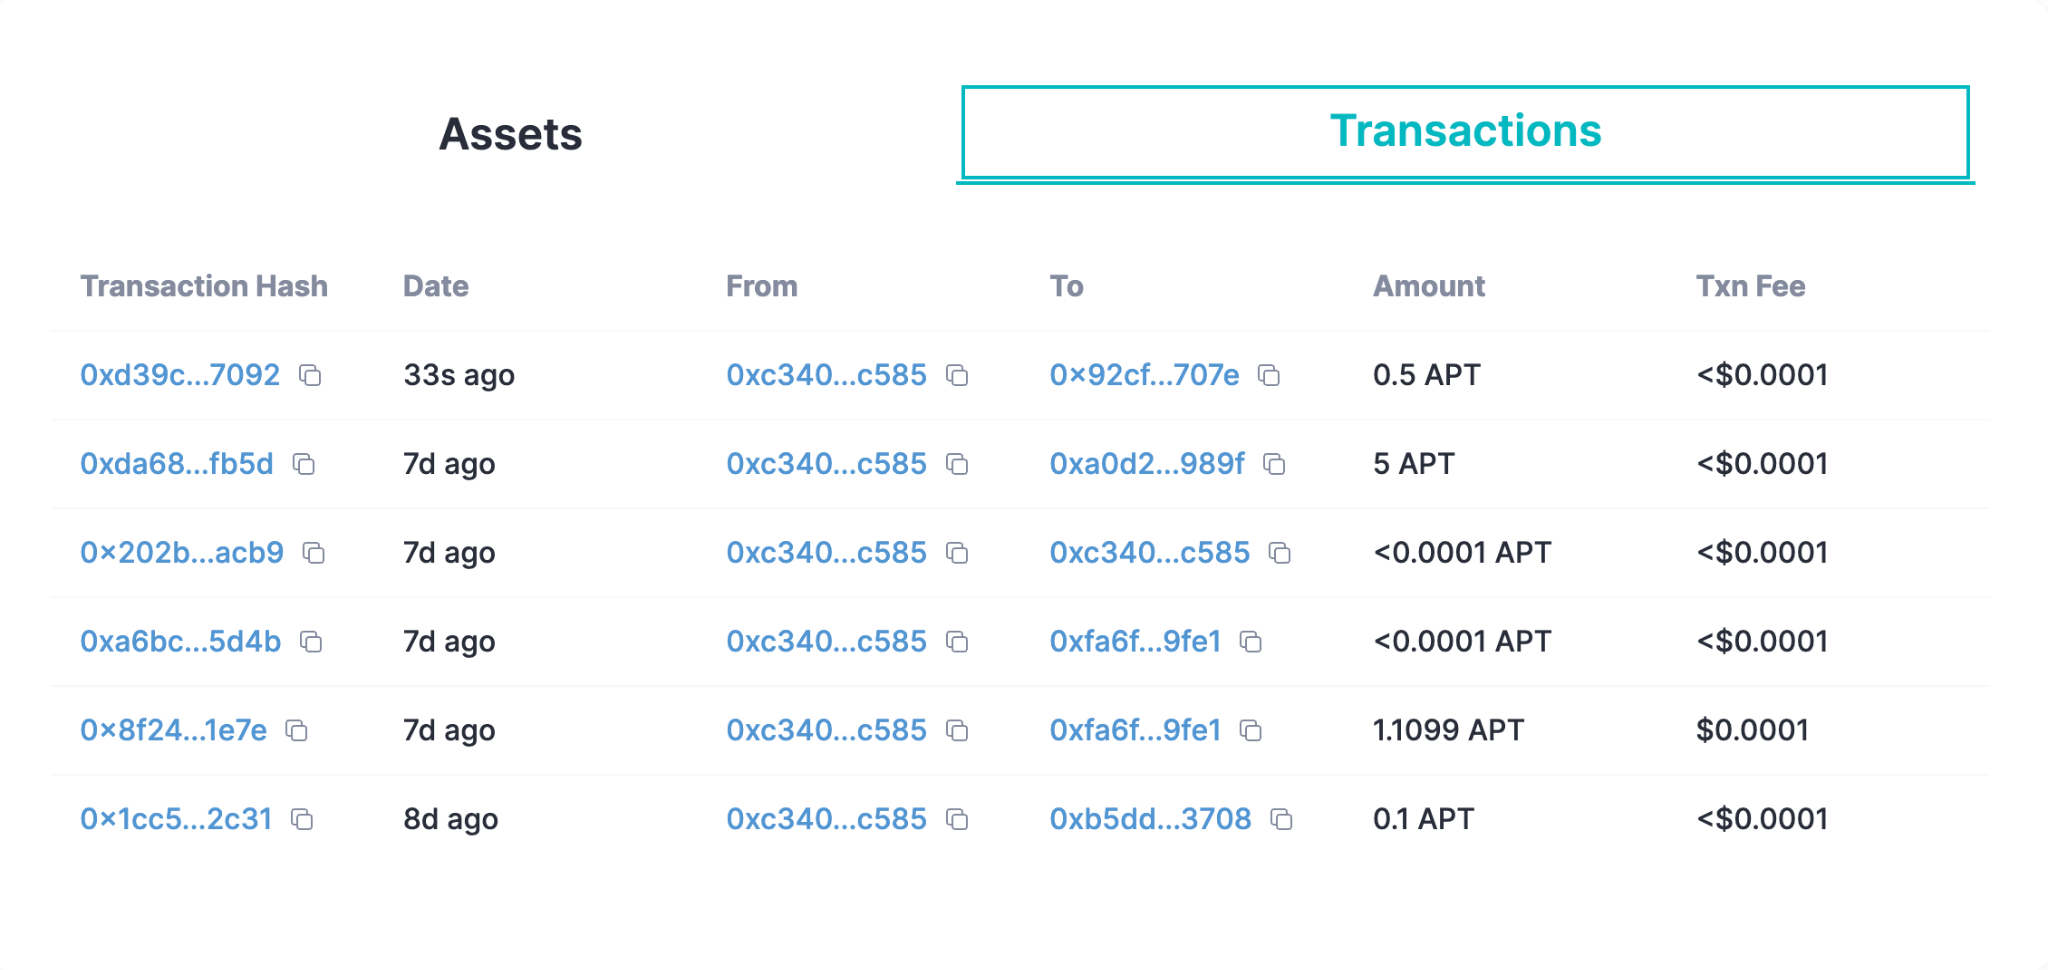
Step 7: View Transaction History
After sending, head to the Activity or Transactions tab to view your past transfers.
Each record includes:
- Sender and receiver identities
- Networks and tokens used
- Transaction hash and timestamp
CIP even allows you to copy wallet addresses directly from transactions for cross-verification or share receipts with contacts.
Step 8: Request Assets
Need to request funds from another user?
Click “Request Assets”, choose the network and token, enter the amount, and click “Generate Link.”
You can then share this unique link with anyone, and they can instantly pay you via their CIP dashboard.
- Go to your account dashboard and click on the Request Assets Button

- Choose Network, Choose Token and Enter amount for the requested assets
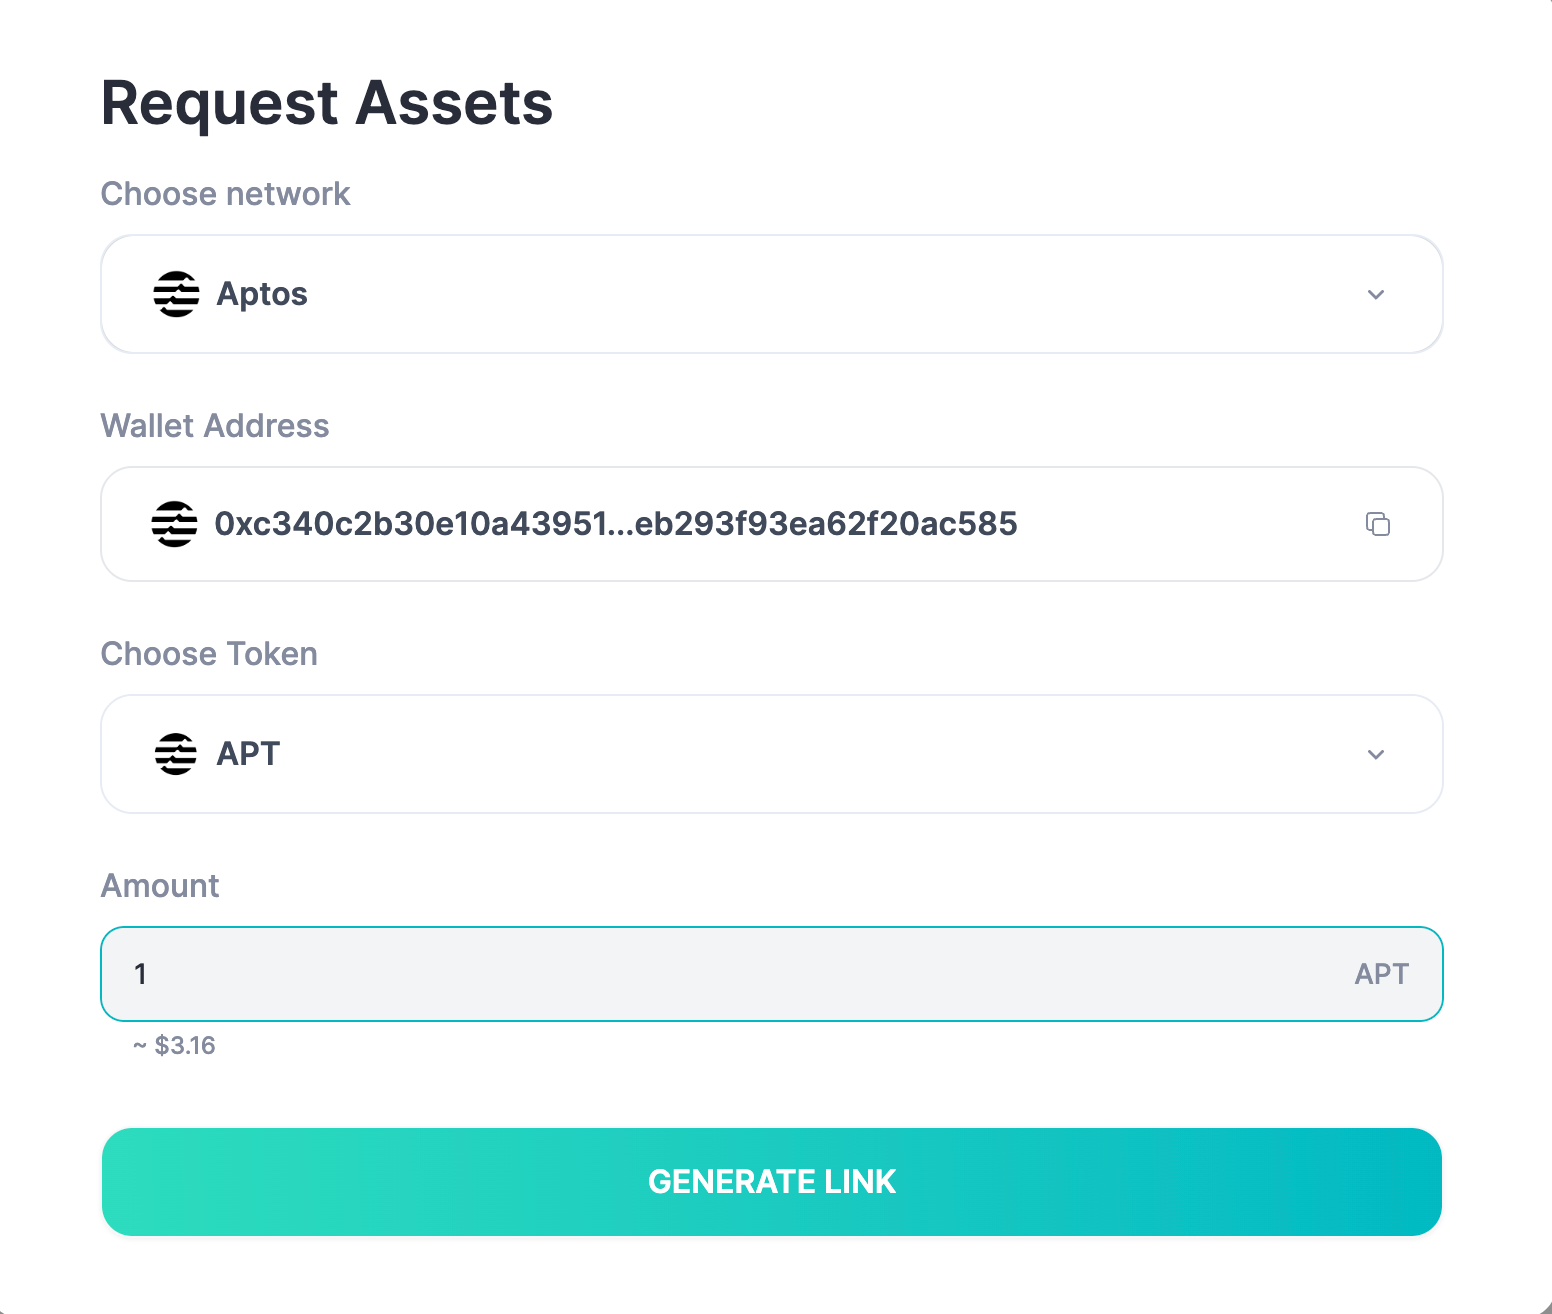
- Share the unique generated link with your friends, peers, or family to receive assets from them

Once the transaction is completed you can view it in your transaction history dashboard in the accounts settings section
The Power of CIP
Cross-Identity Payments (CIP) are more than just a feature; they’re a new layer for Web3 communication and interoperability.
By merging wallet abstraction, multi-chain routing, and identity mapping, CIP enables:
- Human-readable transfers between any naming service (MNS, ENS, SpaceID, Unstoppable Domains, and more)
- Cross-chain routing that abstracts bridges and swaps automatically
- Enhanced safety with real-time name verification and misroute protection
Experience It Yourself
CIP Beta access is now open to a limited number of users and MNS holders.
Join the waitlist at cip.snowball.money. And be among the first to experience identity-powered crypto transfers.
One name. Many chains. Infinite utility.That’s CIP(Cross Identity Payments) by Snowball.
Follow us on social media for the latest updates:
Website | Twitter | Instagram | Discord | Youtube | Telegram | Linkedin | Facebook


