If you’re new to OpenClaw-style agents, the hardest part usually isn’t the agent - it’s getting everything set up and connected without turning it into a weekend project.
This guide walks you through setting up SnowyAI with Anthropic (Claude) and then connecting your agent to Telegram, so you can start using it right away; even if you’re not technical.
By the end, you’ll have:
- your SnowyAI account created
- Anthropic (Claude) selected as your model provider
- your Anthropic API key generated and added
- a Telegram bot created (BotFather) and connected to your SnowyAI agent
Let’s get into the exact steps.
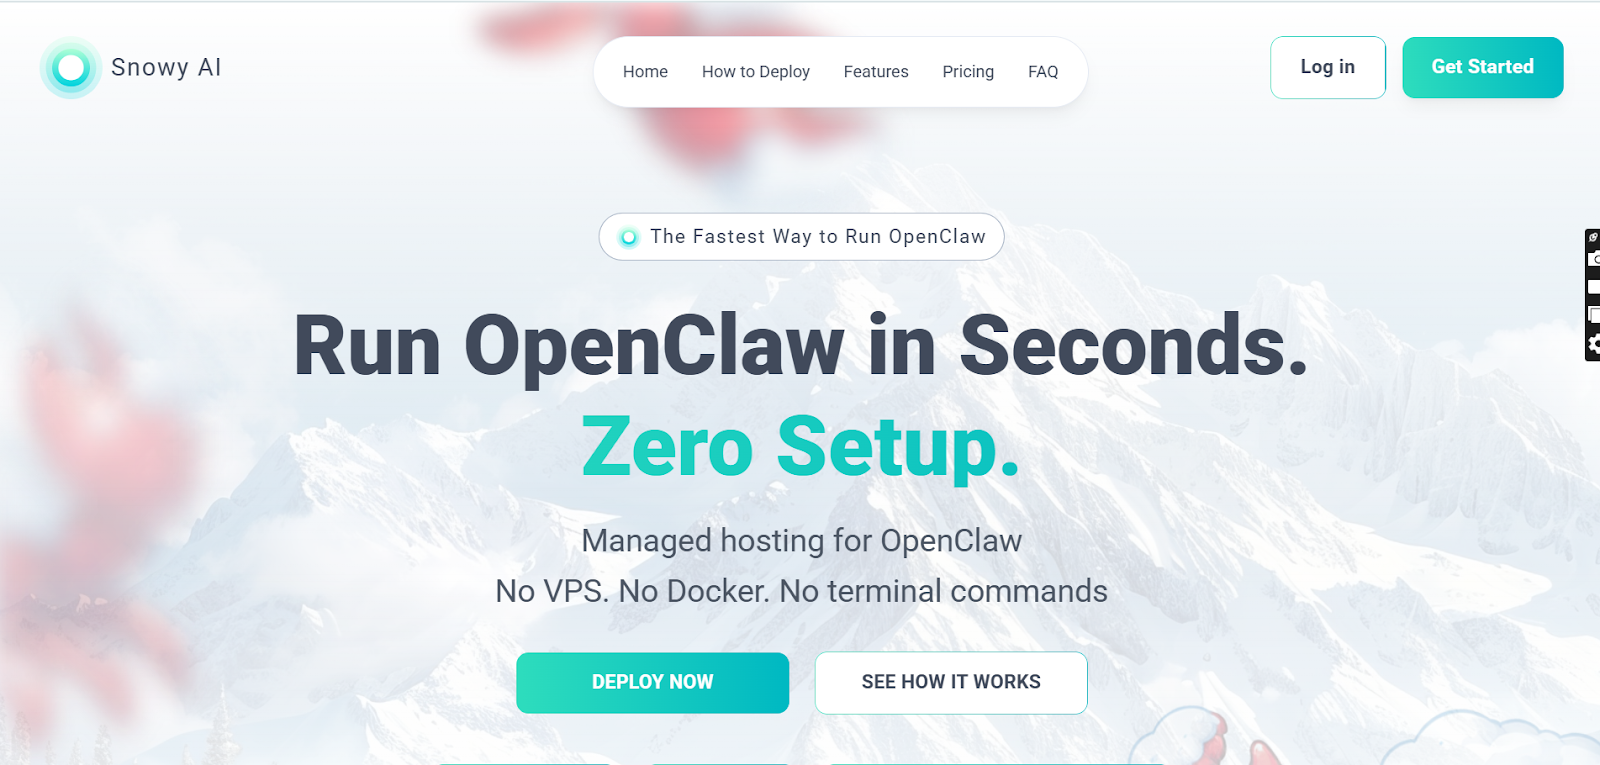
Step 1: Access the Snowy AI Portal
Head over to Snowyai. Here, you’ll land on the Snowy AI homepage with the headline “Run OpenClaw in Seconds” and a Get Started button in the top-right corner. Click Get Started to proceed to the login screen.
Step 2: Login and Authentication (OTP)
Here, you’ll see a “Log in or sign up” pop-up. Enter your email address in the field and click Submit.

Next, a screen titled “Enter confirmation code” will appear- check your inbox for an email from privy.io, then enter the OTP in the boxes shown. Once the code is verified, your account is created and you’ll be redirected to the next step where you can choose your AI model.
Step 3: Choose your AI model (Anthropic in this guide)
Here, you’ll be on the Configure your AI screen where Snowy AI asks you to “Choose a model provider for your Bot.” You’ll see multiple options (Anthropic, OpenAI, Moonshot, OpenRouter, Together AI, and Groq). For this walkthrough, select Anthropic.
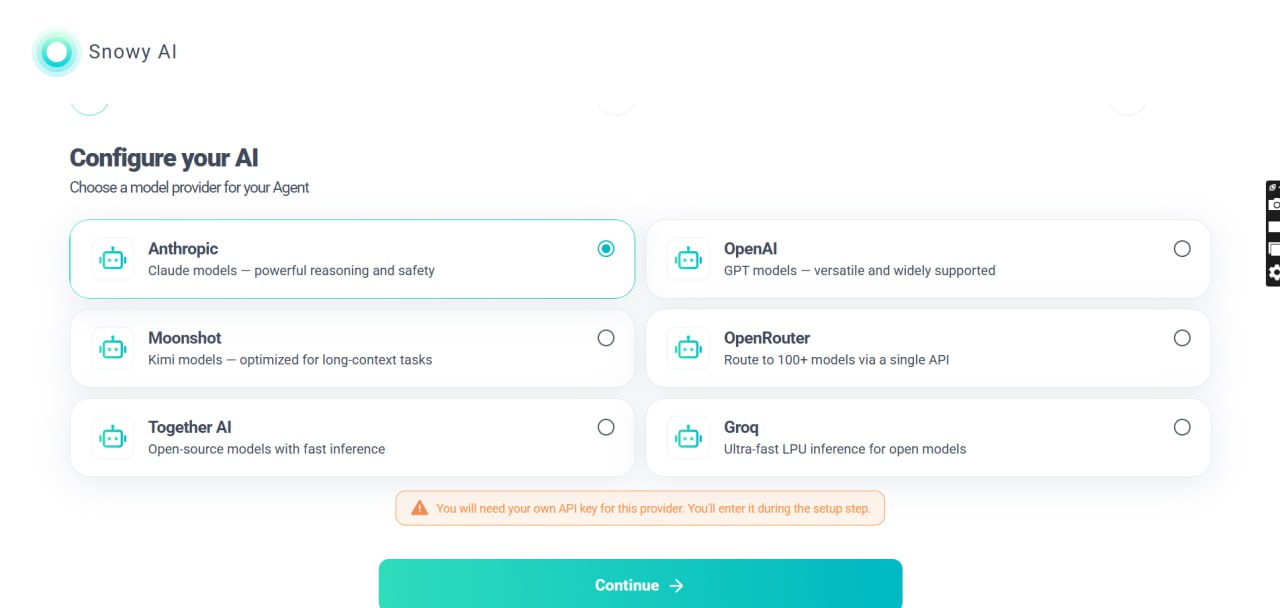
Once you choose Anthropic, notice the note at the bottom: you’ll need your own API key for this provider (you’ll add it during setup after payment). In the next step, we’ll show you exactly where to get your Anthropic API key and what to copy.
Step 4: Setting up Anthropic Api Key
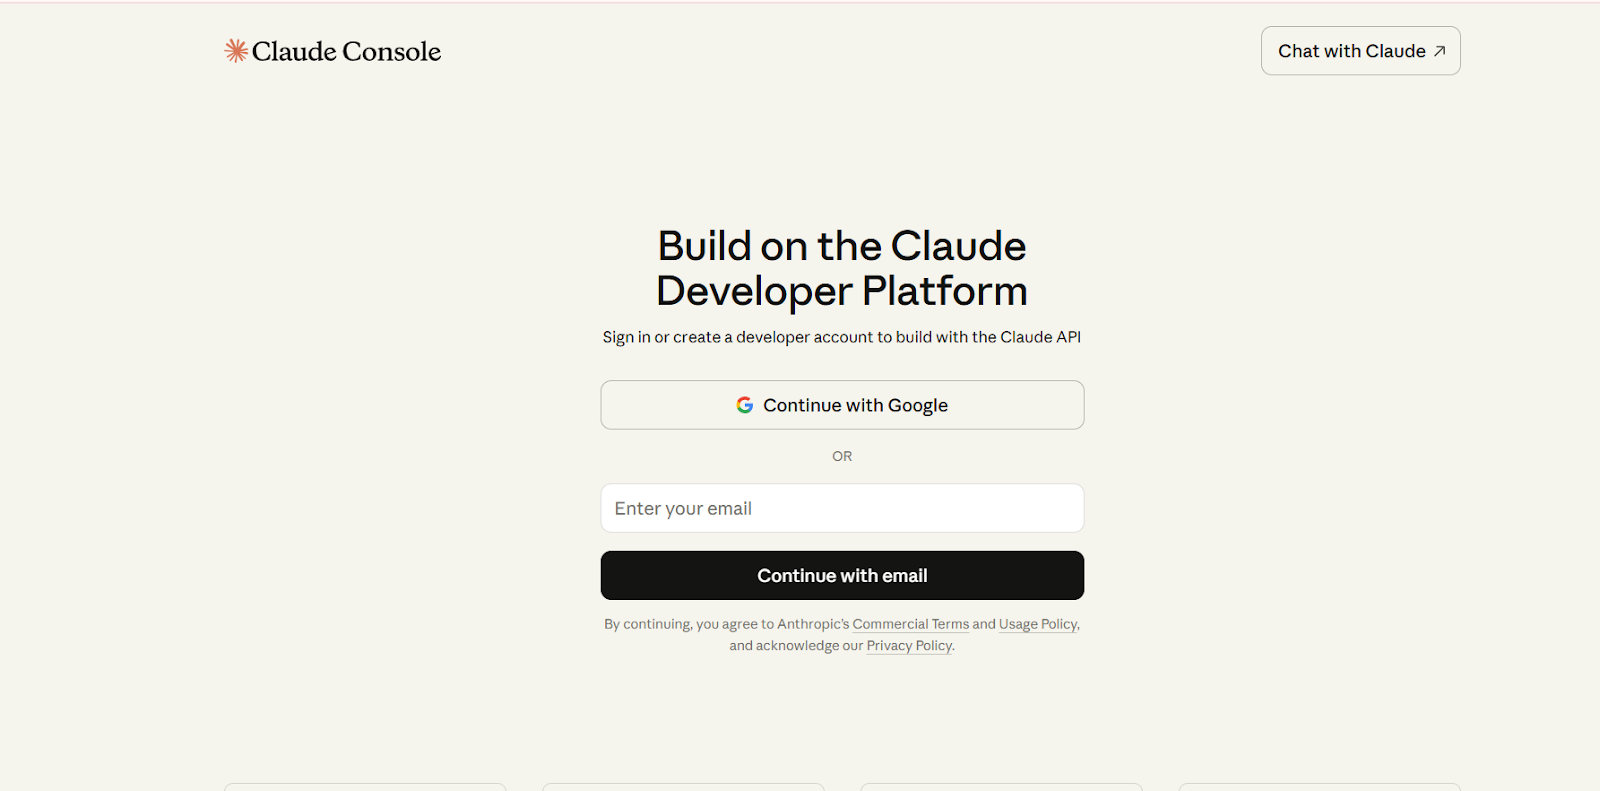
Step 4a.) Create an Account
Open the Claude Developer Platform here and sign in
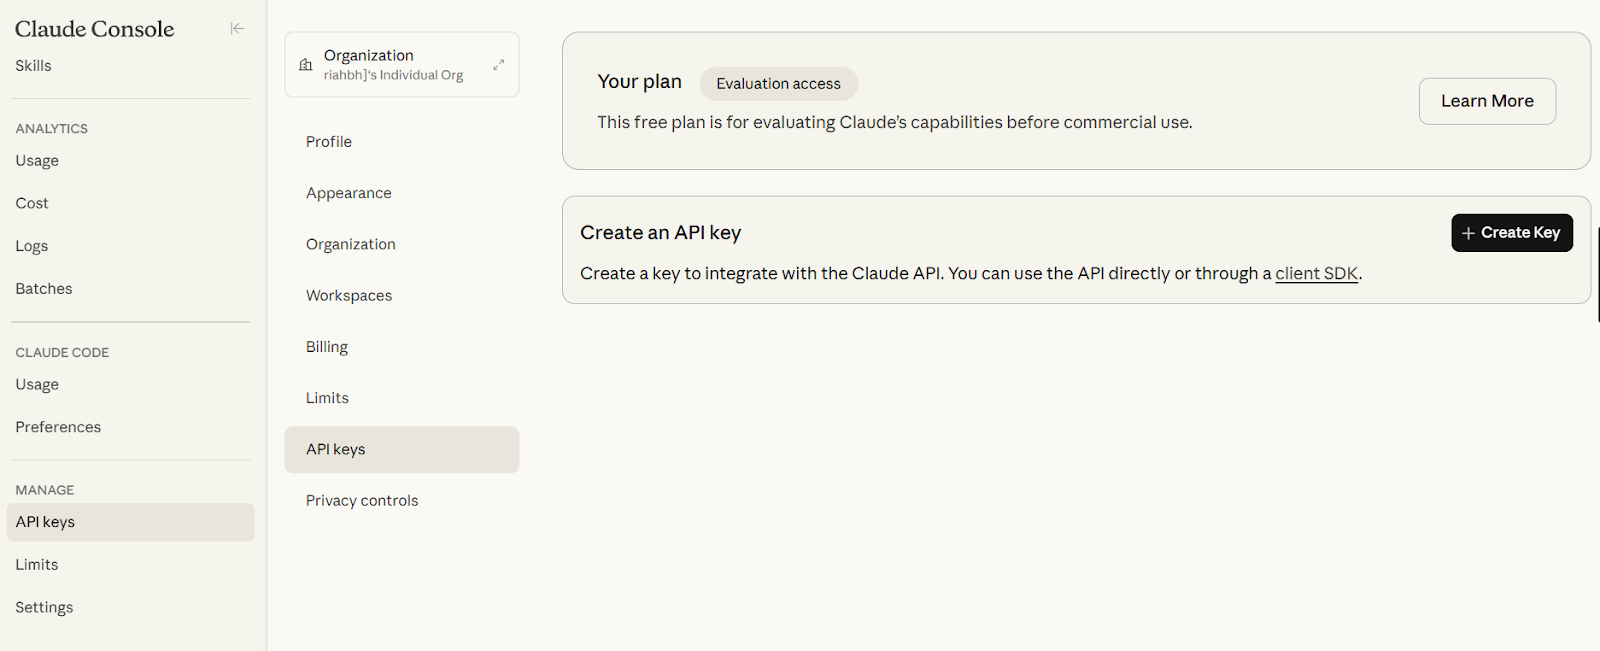
Step 4b.) Generate an API Key
After creating an account, Go to your Console → “API Keys”. (In the left sidebar, you’ll typically see an API Keys section / key icon.)
On the next screen, click Create Key and type in a name for your key. Hit Create Key after naming your key.
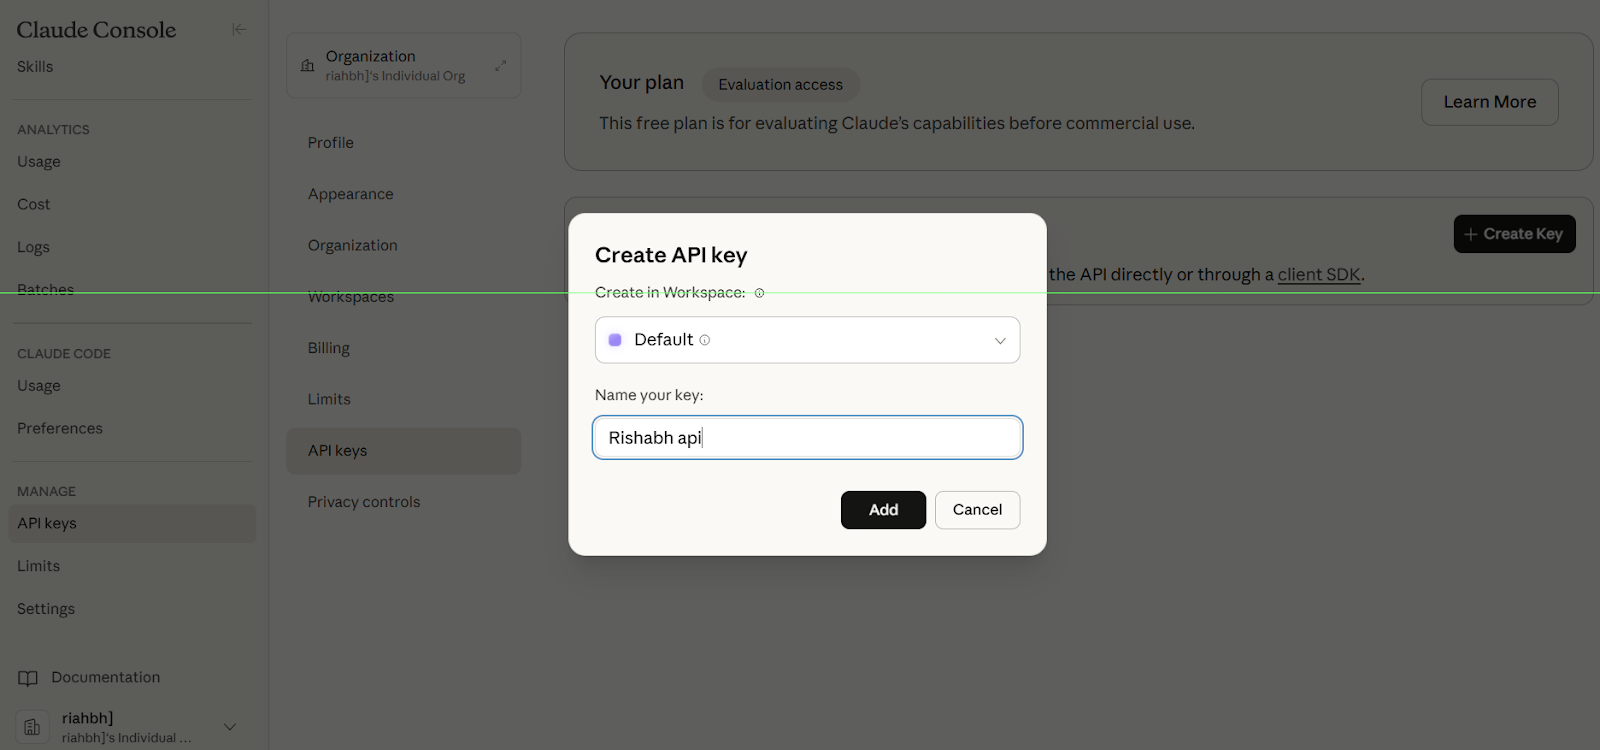
IMPORTANT: Copy your key and store it in a safe location. You won’t be able to re-access the key in the future.
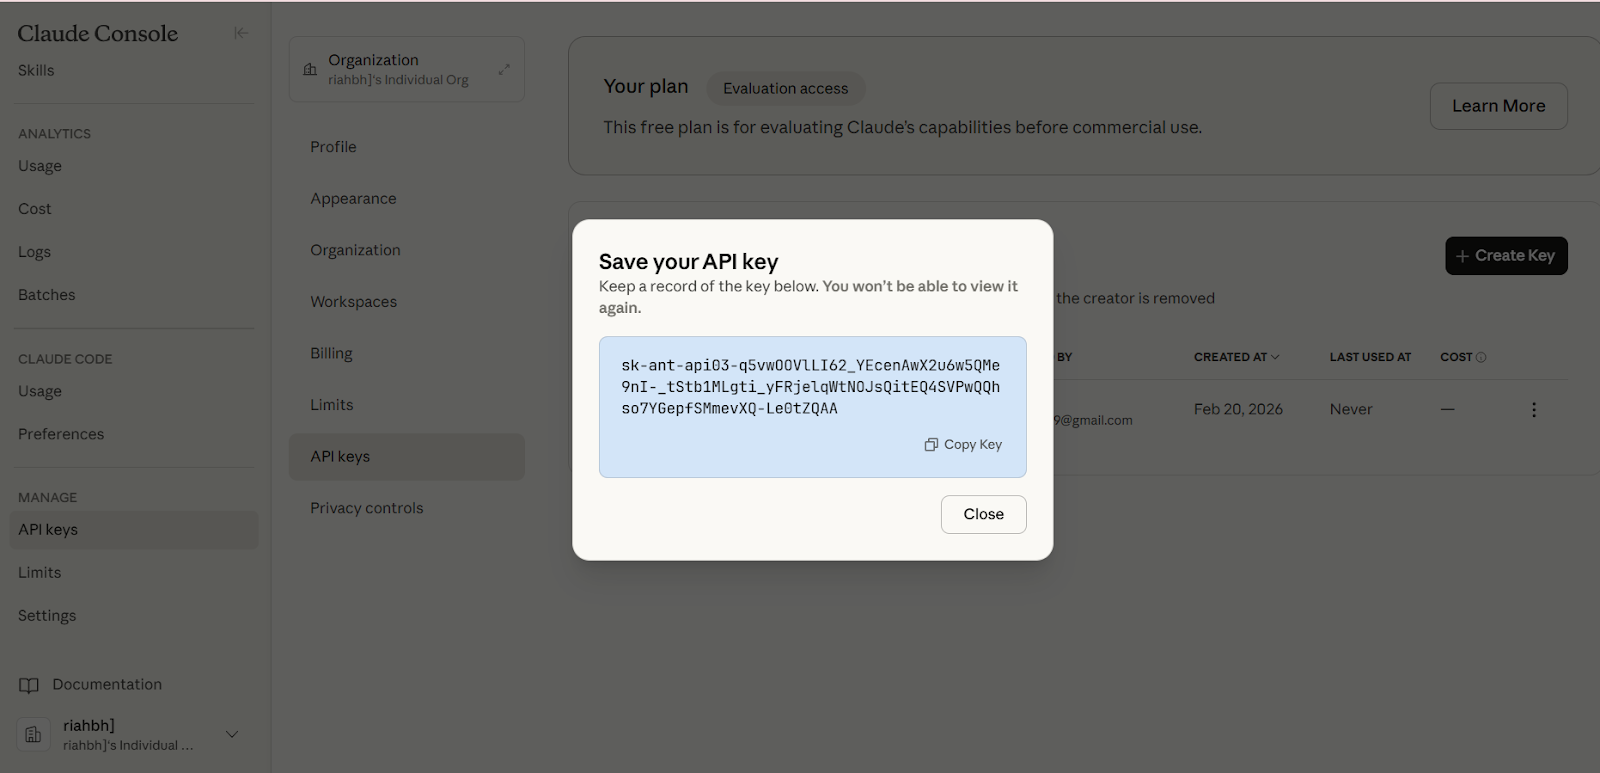
In the next step, we’ll paste this Anthropic API key into SnowyAI and connect your preferred platform.
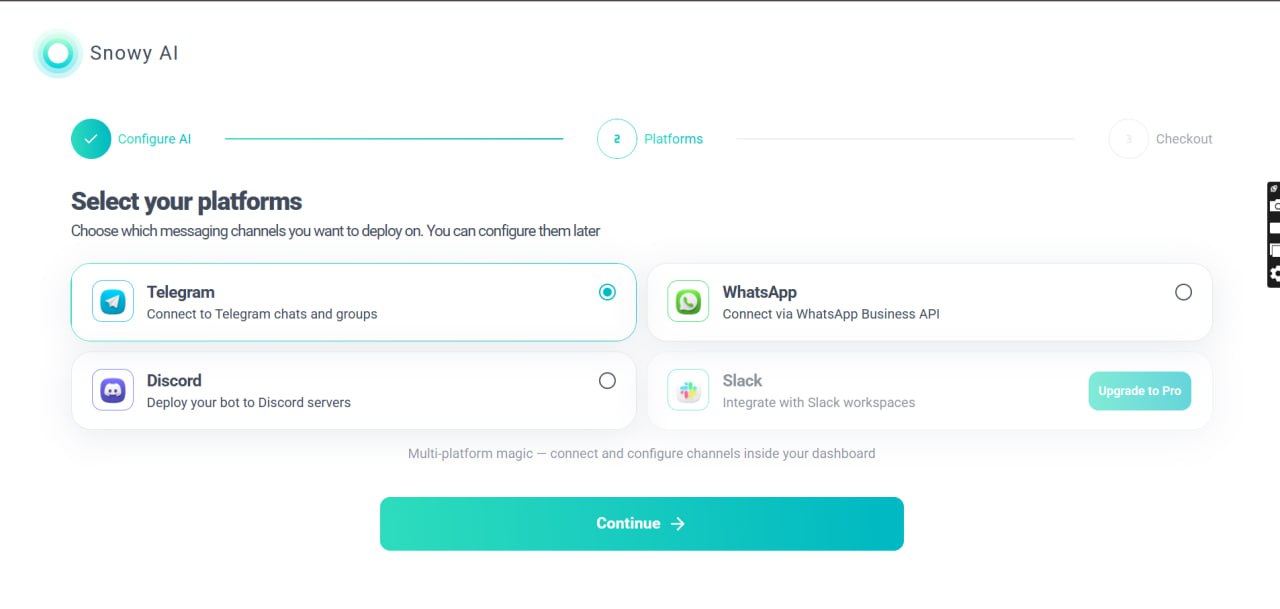
Step 5 : Choosing Social Media Platform to connect
In this step, we have to choose the messaging channel we want to connect (in this guide, we’ll select Telegram), and do the further steps.
Step 6: Add your API key (and start provisioning)
You’ll now be on the Set up your Agent screen.
- Confirm your AI Provider is set to Anthropic.
- Paste your Anthropic API key into the API Key field.
- Tip: You can click Open Console if you need to generate a key again.
- Under Platforms, select Telegram for this guide.
- Once your key is added, SnowyAI will begin provisioning/configuring your agent automatically.

After you paste the API key, you’ll see a provisioning screen; this means your OpenClaw instance is being deployed and configured automatically.
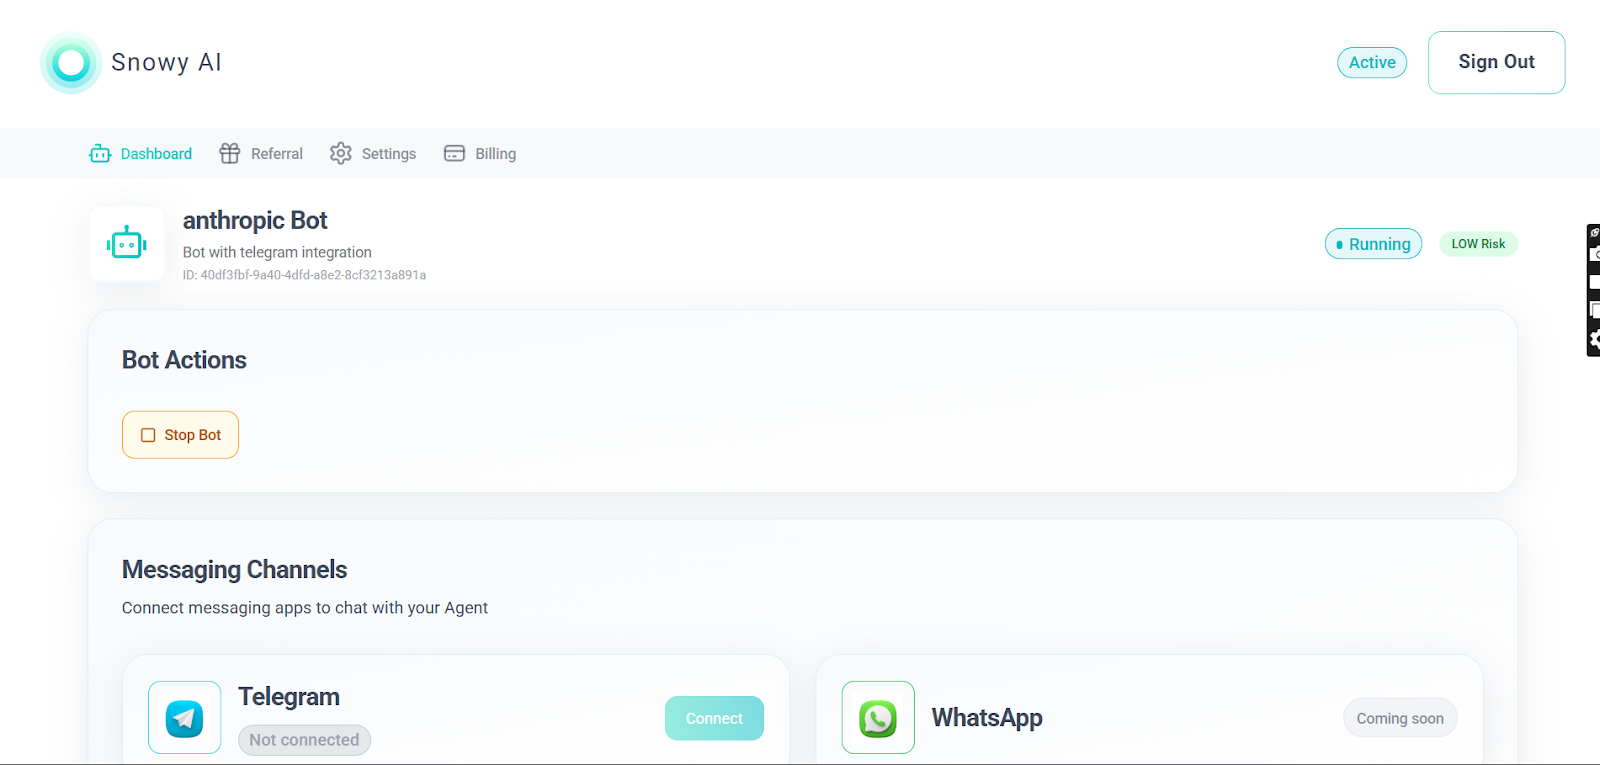
Once deployment is complete, you’ll land on a dashboard where you’ll see the option to connect Telegram. This final connection step links your Telegram bot to SnowyAI, so you can start sending and receiving messages through Telegram.
To complete the Telegram setup, follow the steps below.
Step 1 : Open BotFather
Open your Telegram app, search for BotFather (the official Telegram bot creator), and open the chat; this is where you create and manage your Telegram bots.
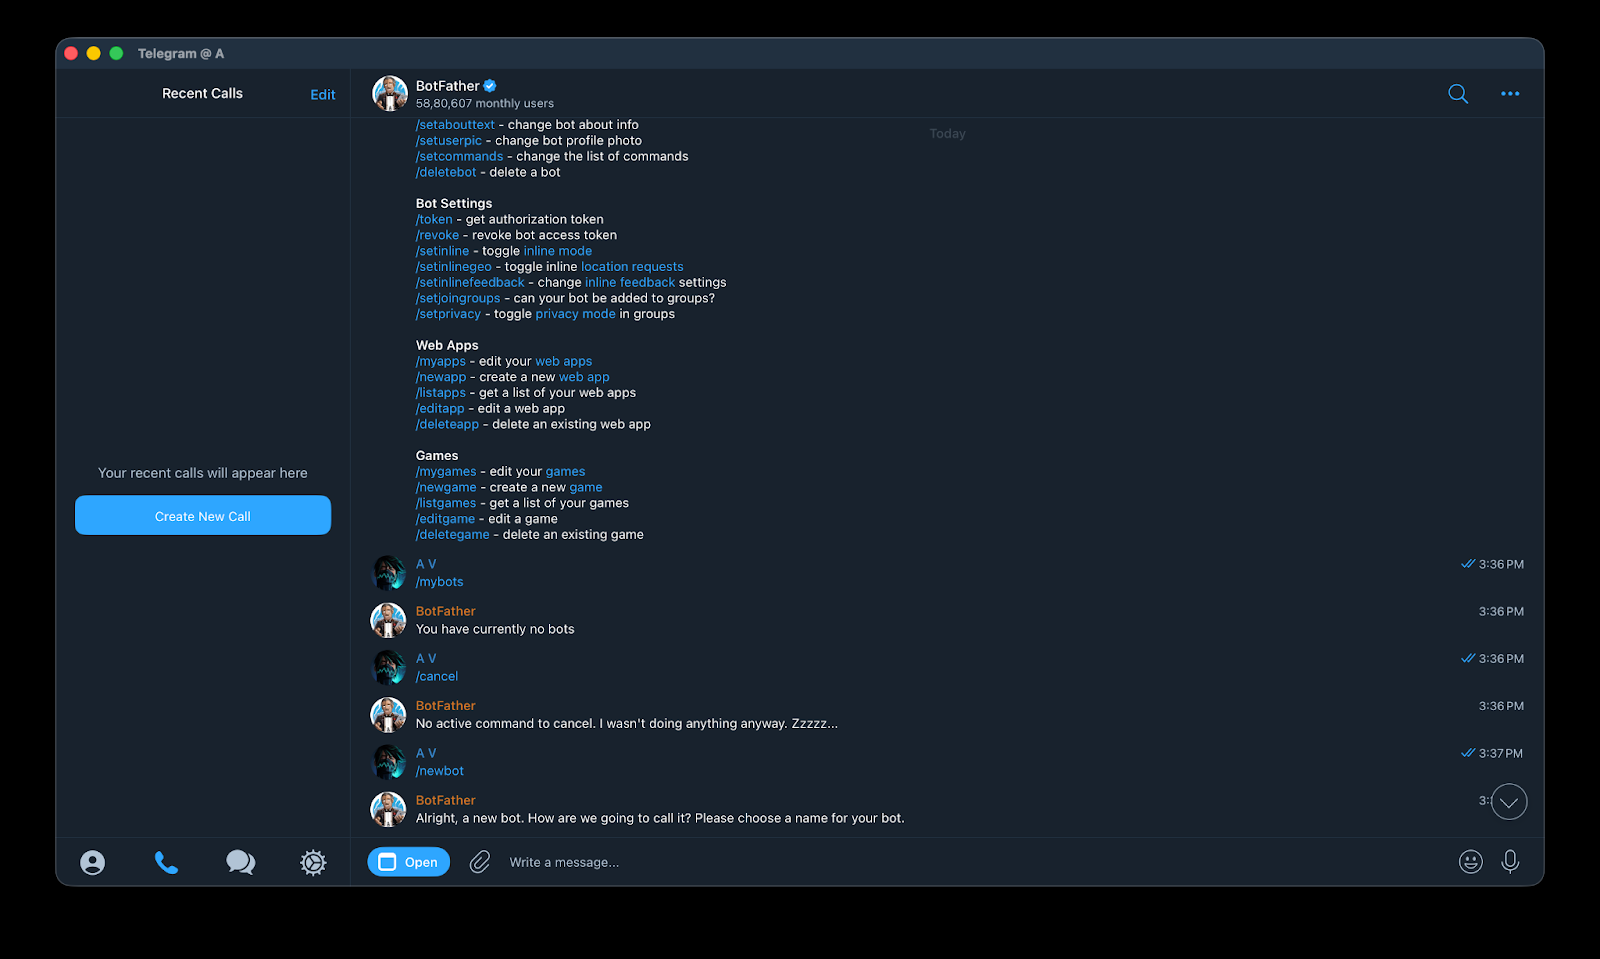
Step 2 : Create a New Bot
In BotFather, type /newbot. BotFather will ask you to choose a bot name first (this is the display name users will see). Send the name you want (example: Snowiai).
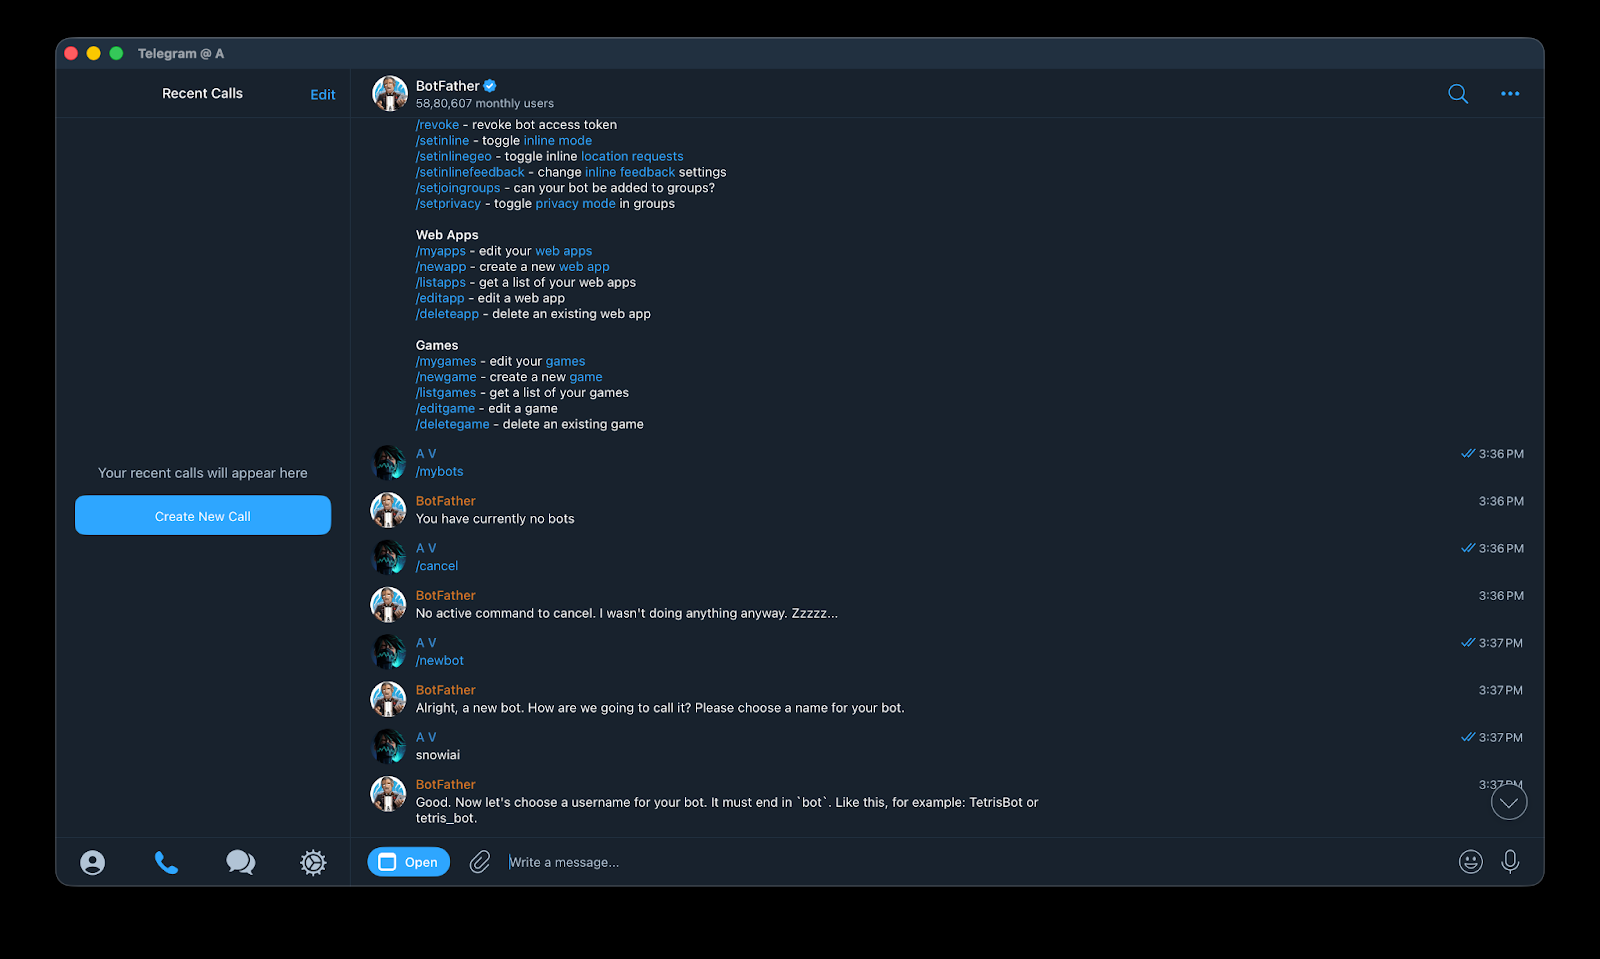
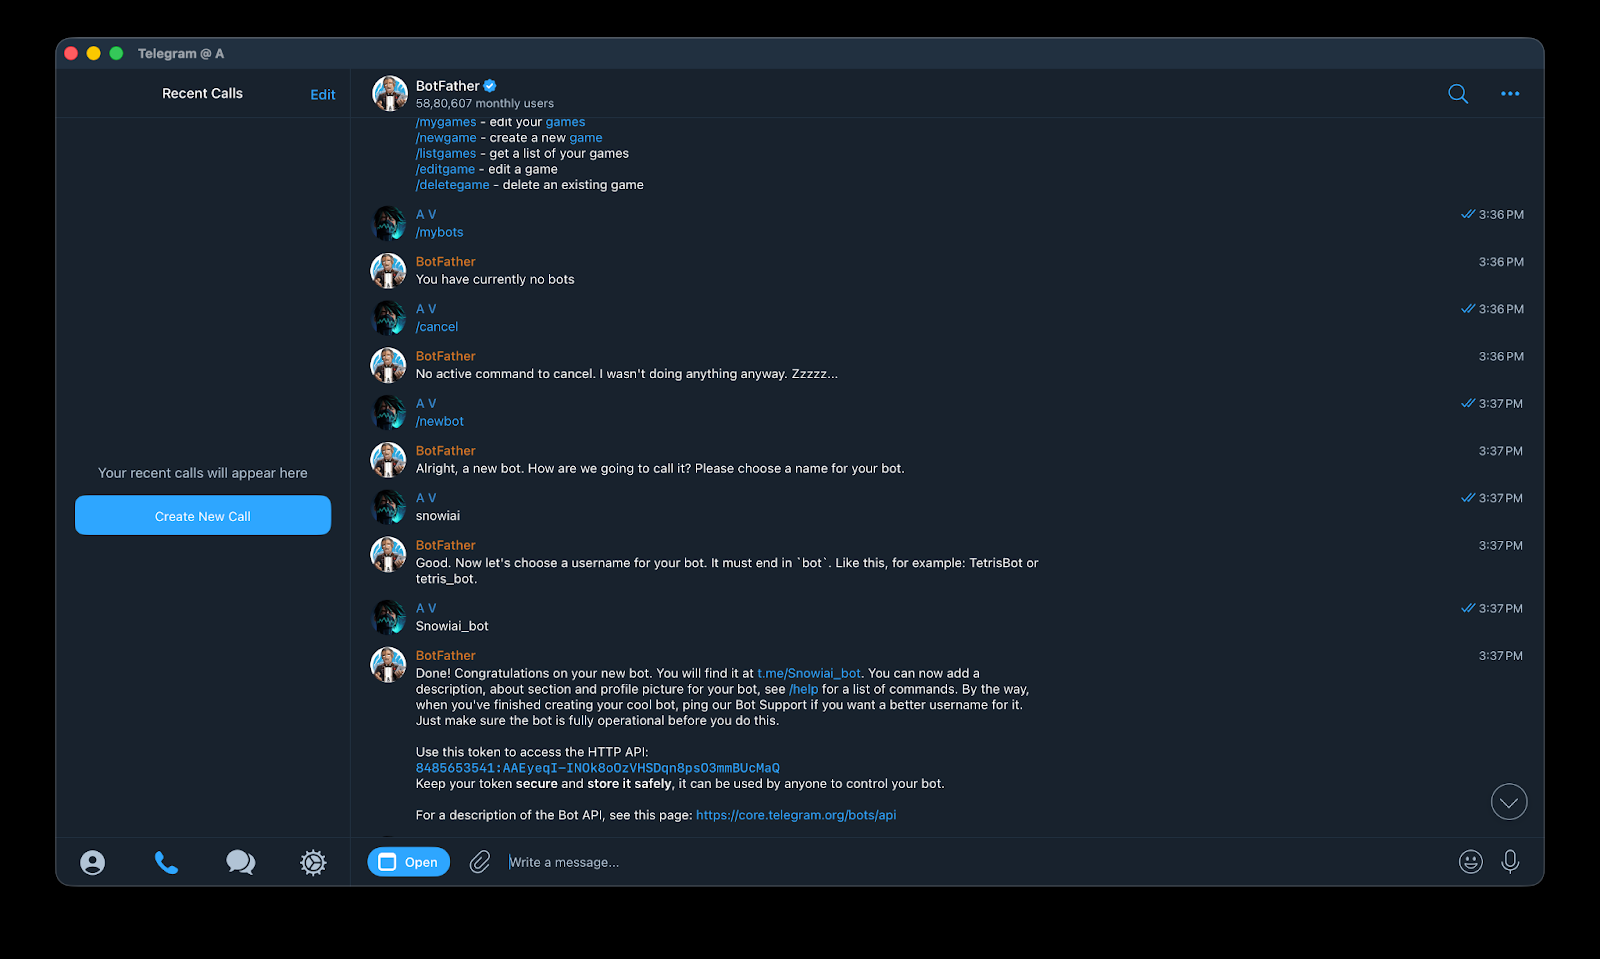
Step 3 : Set a Username and Get the Token
Next, BotFather will ask for a username; it must end with “bot” (example: Snowiai_bot). Once accepted, BotFather will confirm your bot is created and will generate an HTTP API token. Copy this token and keep it private.
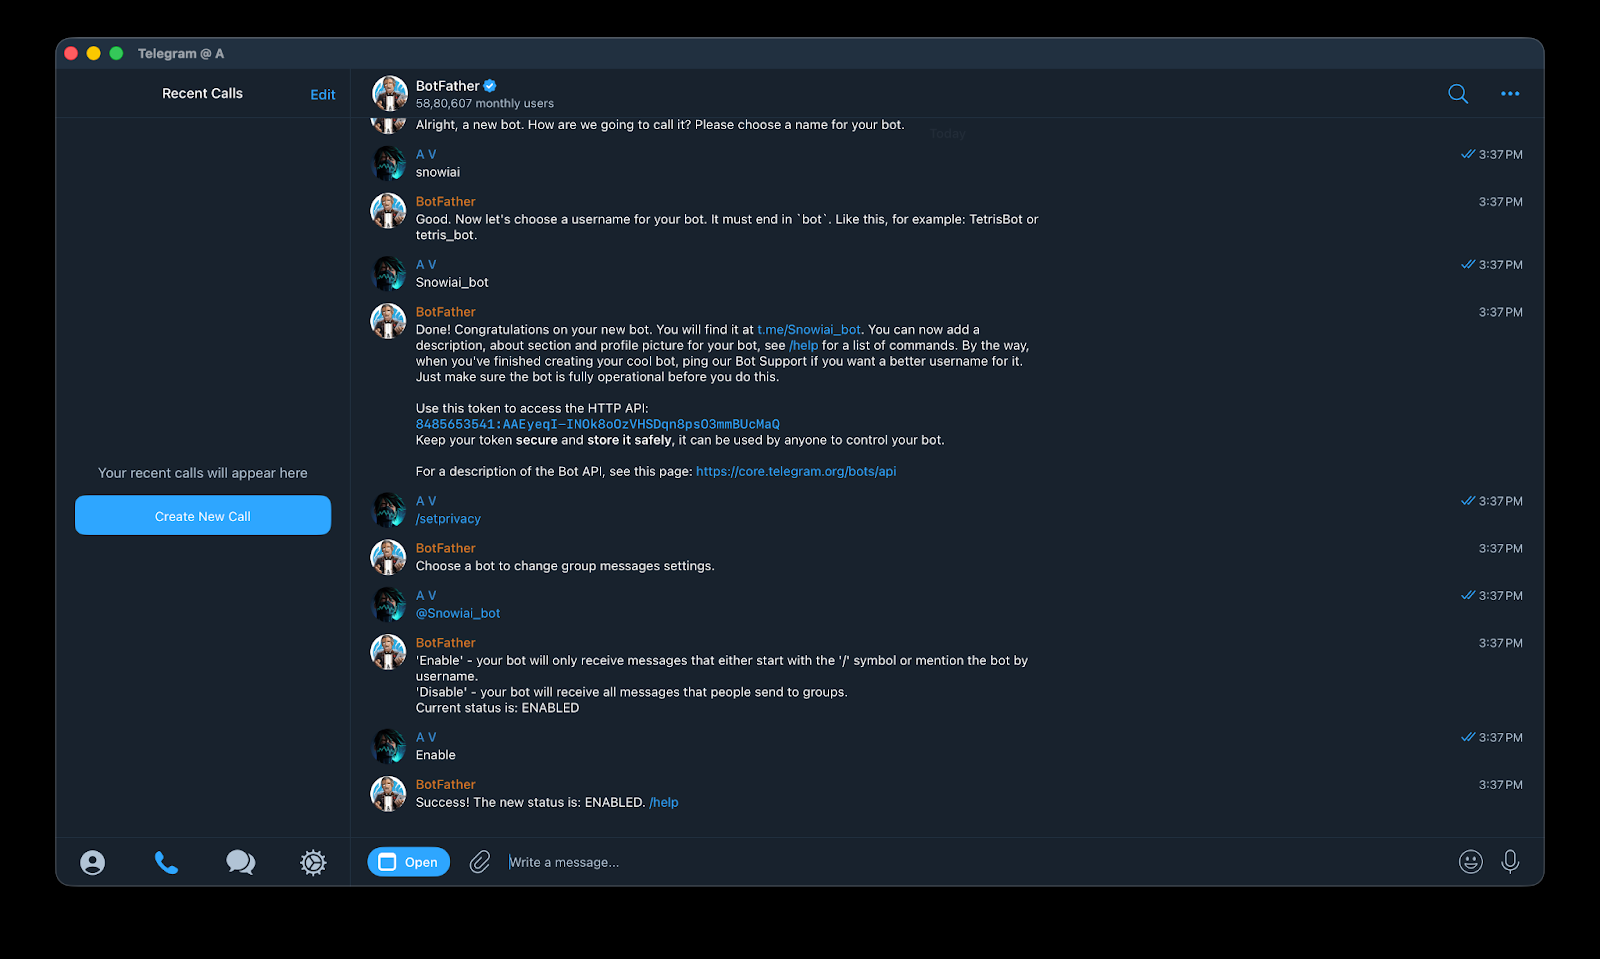
Step 4 : Configure Privacy Mode
Now set privacy based on your integration needs: in BotFather type /setprivacy, select your newly created bot, and then choose the required option (Enable/Disable) as prompted. Once selected, privacy settings are applied and your Telegram bot is ready to be connected and used.
At this point, Telegram bot is ready. Now, we’ll go back to SnowyAI, paste the bot token, connect Telegram, and verify everything so agent can send and receive messages directly on Telegram.
Get Started Today
Try it here: agent.snowballlabs.org
Follow us on social media for the latest updates: Website | Twitter | Instagram | Discord | Youtube | Telegram | Linkedin | Facebook


